To share your screen on Google Meet, join a call and click Present now (computer) or three-dot menu → Share screen (mobile), then pick Your entire screen, A window, or A tab and click Share.
Table of contents
- Key takeaways
- How to share your screen on Google Meet (computer)
- Steps to share screen on Google Meet desktop
- The three Google Meet present modes — when to use which
- How to stop presenting on desktop
- How to share your screen on Google Meet (mobile)
- How to share screen on Google Meet (Android)
- How to share screen on Google Meet (iPhone)
- How to stop screen sharing on mobile
- Should you pick entire screen, a window, or a tab?
- When to pick Your entire screen
- When to pick A window
- When to pick A tab
- Quick guide by use case
- How to share screen on Google Meet with audio
- December 2025 update: system audio sharing for window + entire screen
- Share audio on desktop (the tab method — most reliable)
- Share audio on desktop (window / entire screen — new in Dec 2025)
- Why A tab is still the most reliable for video
- Sharing audio on mobile
- How to present Google Slides, Docs, and Sheets in Google Meet
- Present Google Slides in Google Meet
- Share Google Docs or Google Sheets
- Why a tab beats full screen for Google Docs
- Before you click Share — important pre-flight checks
- Avoid leaking notifications and private content
- Verify the right screen or tab before clicking Share
- Pre-presentation checklist
- Common Google Meet screen-sharing errors and how to fix them
- Can't see Present now or Share screen
- Can't start screen sharing on desktop
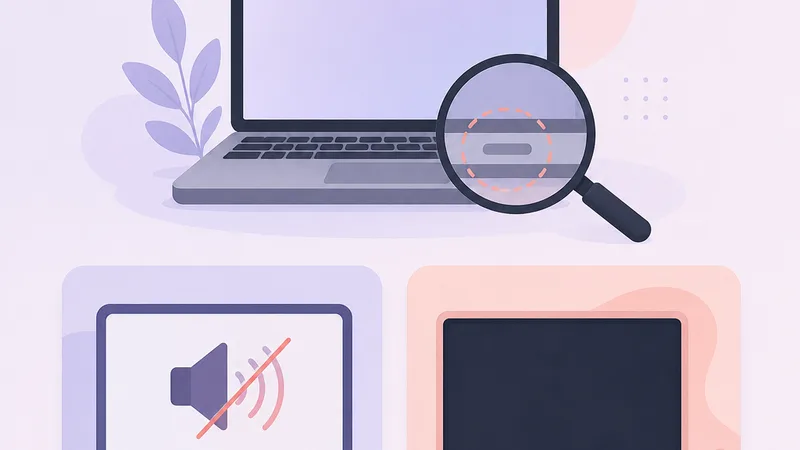
- Sharing works but there's no audio
- Black screen or viewers can't see content
- Can the host block or stop screen sharing?
- When participants can't share screen
- When to use host-managed presenting
- Multiple presenters at once
- Pair screen sharing with recording and transcripts
- Frequently Asked Questions
- What's the fastest way to share screen on Google Meet desktop?
- Can I share screen on Google Meet from a phone?
- Can Google Meet share screen with audio?
- Should I pick entire screen or a tab?
- Why can't I share screen on Google Meet?
- Does muting my microphone stop audio sharing?
- How many people can share screen at the same time in Google Meet?
This guide walks through every step on computer, Android, and iPhone, how to share your screen with audio (including Google's December 2025 system-audio update), how to stop presenting, and how to fix the most common errors when screen sharing in Google Meet.
Key takeaways
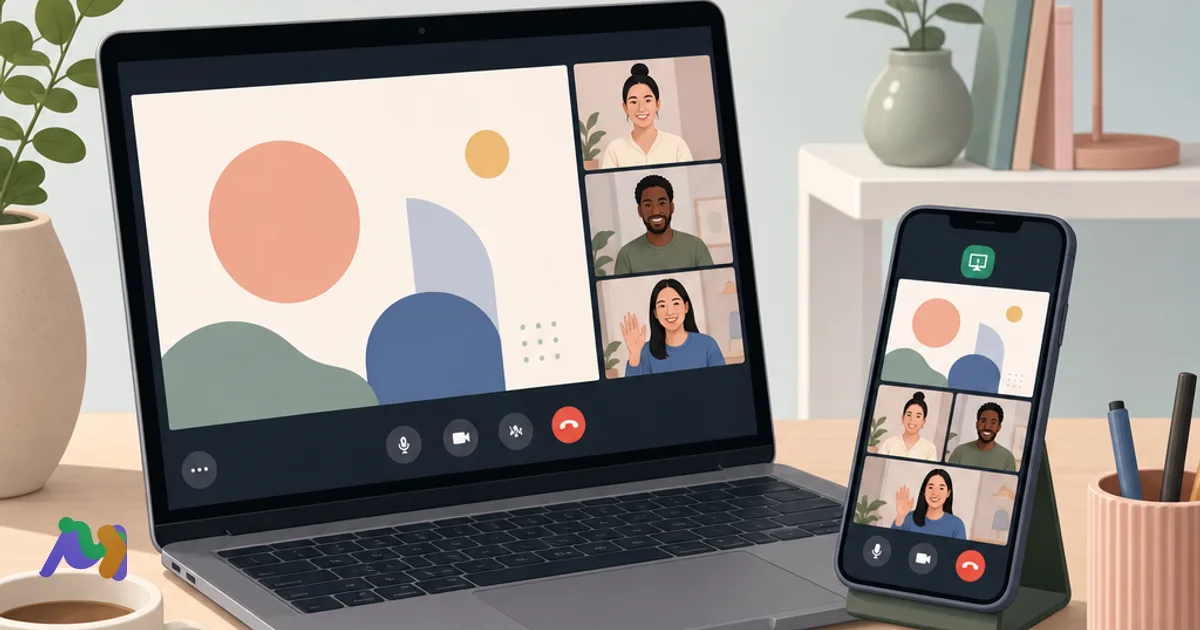
You can share your screen on Google Meet from both computer and mobile in a few clicks during the call.
On computer, the key button is Present now — then pick the right presenting mode.
Google Meet offers three present modes: Your entire screen, A window, or A tab — each fits a different use case.
If you need to share a video with sound, the most stable choice is A tab in Google Chrome — tab audio is shared by default.
December 2025 update: you can now share system audio when presenting A window or Your entire screen too (previously only tabs supported audio) — requires macOS 14.2+ or Windows 11+ and Chrome 142+.
On Android and iPhone, screen sharing is simple, but every on-screen notification can leak — turn on Do Not Disturb first.
You'll learn how to stop presenting properly so you don't accidentally keep broadcasting after the demo ends.
The guide covers the common errors: missing Present button, no audio, black screen, and host-restricted sharing.
A Meet call supports up to 10 simultaneous presentations from different participants.
If you're the host, you can restrict presenting permissions for a tighter, safer meeting.
How to share your screen on Google Meet (computer)
Screen sharing from a computer is easier and more stable than mobile. The main thing is to pick the right source from the start.
Steps to share screen on Google Meet desktop
Open Google Meet and join the call as usual.
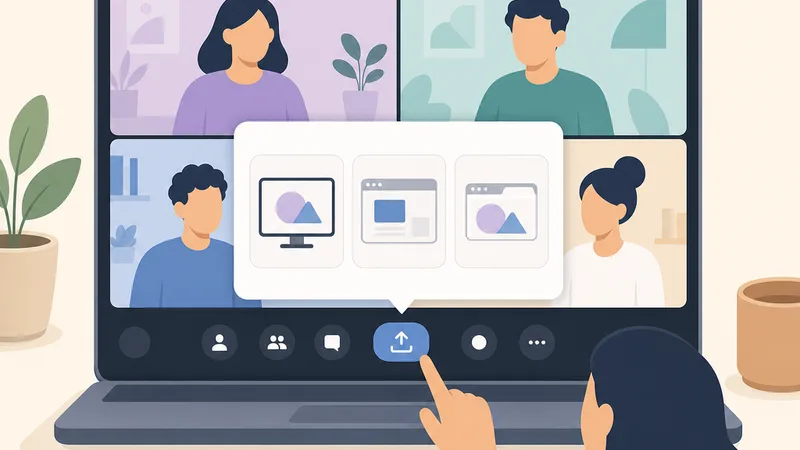
In the bottom toolbar, click Present now.
Choose one of the three modes:
Your entire screen
A window
A tab
Select the exact screen, window, or tab to share.
On dual monitors, double-check which display is highlighted to avoid presenting the wrong one.Click Share to start presenting.
Open your slides or file before clicking Present. If multiple tabs share similar names, read the tab title carefully to avoid picking the wrong one.
Note: Some Google Workspace editions (Enterprise, Education) also support Present from camera — broadcasting your camera feed directly into the presentation area, useful for handwritten demos, physical products, or whiteboard work.
Field-tested tips
Open documents, websites, or videos before joining the meeting.
Close unrelated tabs so you can pick the right source faster.
On a slow computer, keep only the apps you need open for smoother presenting.
How not to pick the wrong source
Many people press Present now correctly but choose the wrong tab.
If viewers see something other than what you intended, the source was wrong.
After clicking Share, glance at the preview or ask a participant to confirm what they see.
The three Google Meet present modes — when to use which
Picking the wrong mode is the most common screen-share mistake. The table below helps you decide quickly.
Mode | When to use | Pros | Cons |
|---|---|---|---|
Your entire screen | Switching between many apps, process demos, software tutorials | Most flexible | Easy to leak desktop, notifications, private content |
A window | Presenting one app or one file | Cleaner, more private than full screen | Pick the wrong window and viewers see nothing useful |
A tab | Sharing a website, YouTube, video, or browser-based doc | Best for web content; tab audio shares by default | Only shows content inside the selected tab |
Quick guide:
Sharing a document or app → pick A window.
Sharing video or web content → pick A tab.
Demoing across multiple apps → pick Your entire screen.
How to stop presenting on desktop
Two ways to stop:
Inside the Google Meet window, click Stop presenting.
On the browser or OS sharing-notification bar, click Stop sharing.
After stopping, glance at the Meet window to confirm you're no longer presenting. Always stop sharing before switching to private content.
How to share your screen on Google Meet (mobile)
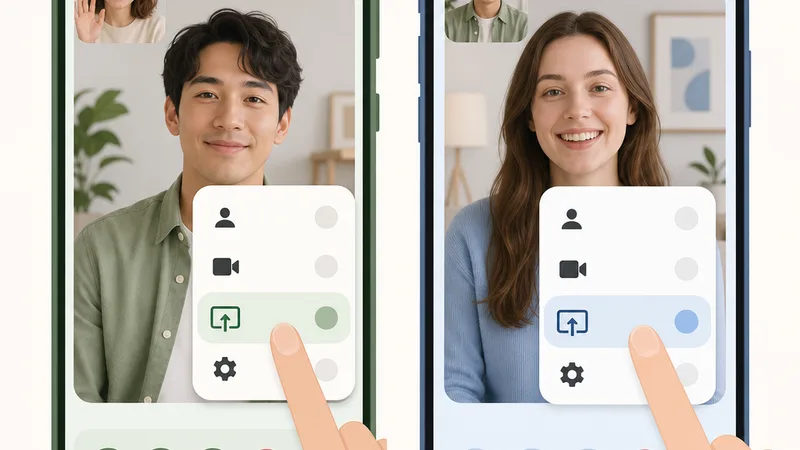
Google Meet supports screen sharing on both Android and iPhone. The steps are simple, but remember that every action and notification on your screen becomes visible to other participants.
How to share screen on Google Meet (Android)
Open the Google Meet app and join the call.
Tap the three-dot icon at the bottom of the screen.
Tap Share screen.
Read the warning that everything on your screen will be visible.
Tap Start sharing (or Start now) to begin broadcasting.
Your entire Android screen is now visible in the Meet call. If you open another app, participants see that too.
Warnings
Don't open banking apps, personal email, or private messages while presenting.
Notifications from WhatsApp, Messenger, or email can pop up over your screen.
Turn on Do Not Disturb before presenting.
Useful tips:
Open the file, slide, or website before tapping Share.
Minimize unnecessary actions during the demo.
On a weak network, avoid running heavy apps while sharing.
How to share screen on Google Meet (iPhone)
Open Google Meet and join the call.
Tap the three-dot icon.
Tap Share screen.
Tap Start Broadcast.
Wait a few seconds for iPhone to begin broadcasting to Meet.
While sharing, iPhone shows a broadcast status indicator at the top of the screen or in the Dynamic Island, depending on your model. Watch this indicator to confirm sharing is actually live.
Important notes:
Turn on Do Not Disturb before starting.
Close sensitive apps before the meeting.
Check the broadcast indicator to confirm you've actually started sharing.
How to stop screen sharing on mobile
On Android: return to the sharing panel and tap Stop sharing.
On iPhone: tap Stop Broadcast.
Don't just quit the app and assume sharing has stopped.
After stopping, verify the sharing status is fully gone.
Return to the meeting view to continue the call.
Should you pick entire screen, a window, or a tab?
If you're not sure which mode to pick, decide based on the actual situation. The goal: share the right content, easy to follow, no leaks.
When to pick Your entire screen
You need to switch between multiple apps during the presentation.
Good for demoing workflows, walkthroughs, or software training.
Most flexible — no need to stop sharing every time you switch apps.
Biggest downside: easy to leak desktop, popups, and notifications.
Best for presenters demoing many steps across several tools.
To stay safer:
Close email, personal chat, and shopping tabs.
Turn off notifications before the meeting.
Only pick entire screen when you genuinely need to flip between apps.
When to pick A window
You only need to present one app or one file.
Common examples: PowerPoint, PDF, accounting software, learning apps.
Cleaner and more private than full screen.
Viewers only see the window you picked — nothing else on your machine.
Downside: if you pick the wrong window, or the window gets hidden behind another, viewers see nothing useful.
This is the safest choice for most internal team meetings or document walkthroughs.
When to pick A tab
A tab shares one browser tab.
Best for websites, YouTube, training videos, or web app demos.
The most reliable mode for sharing audio — tab audio shares automatically.
Works best in Google Chrome.
Clean, focused, less risk of accidental leaks.
Downside: if you switch to a different tab, viewers can't follow.
If you're playing video or web content, A tab is your default choice.
Quick guide by use case
Demoing many apps → Your entire screen.
Presenting one app or file → A window.
Sharing a website, YouTube, or video with sound → A tab.
If you're unsure, pick A window or A tab — they're safer than full screen.
How to share screen on Google Meet with audio
The most common ask: play a video and let participants hear the sound too. Google made this much easier in December 2025 — read on for what changed.
December 2025 update: system audio sharing for window + entire screen
Before December 2025, the only way to share audio in Google Meet was via A tab. Sharing A window or Your entire screen sent video but no sound.
That changed with the rollout starting December 17, 2025 (Rapid Release) and January 13, 2026 (Scheduled Release). You can now toggle Also share system audio when presenting a window or entire screen.
Requirements:
macOS 14.2 or newer, or Windows 11 or newer.
Google Chrome 142 or newer.
Available to all Google Workspace customers, Workspace Individual, and personal Google accounts.
On macOS Sequoia, you'll need to grant Chrome OS-level permission the first time you use it.
The toggle defaults to off — you have to opt in every time you present.
Share audio on desktop (the tab method — most reliable)
Join the Google Meet call.
Click Present now.
Choose A tab.
Pick the tab playing your video or audio content.
Tab audio is shared by default — no extra toggle needed, but you'll see an Also share tab audio checkbox confirming it's on.
Click Share.
If viewers see the video but hear nothing, you most likely picked the wrong tab — the one playing audio has to be the one you select.
Share audio on desktop (window / entire screen — new in Dec 2025)
Click Present now.
Pick A window or Your entire screen.
In the source-picker dialog, toggle on Also share system audio.
Pick the window or screen to share.
Click Share.
Important caveats:
If you mute your microphone, audio sharing stops automatically. Keep the mic unmuted (or use the meeting's audio routing carefully).
This works on macOS 14.2+ and Windows 11+ only. Older OSes still need the tab method.
On macOS Sequoia, grant Chrome the system audio permission when prompted.
Why A tab is still the most reliable for video
Browser tabs are optimized for web content and video.
Audio sync is usually tighter than with full-screen sharing.
Less risk of leaking other windows or notifications.
Viewers stay focused on the exact content playing.
On Google Chrome, this remains the smoothest path.
Compared to Your entire screen, A tab is cleaner. Compared to A window, A tab usually handles video audio more reliably.
Sharing audio on mobile
On Android, when you start sharing, you'll see a Share audio checkbox in the "Present to everyone" prompt — enable it to broadcast device audio.
Audio sharing capability varies by device and OS version.
Don't expect mobile audio to be as stable as desktop.
If you're sharing a critical video, test with a colleague first.
For mission-critical video presentations, switch to a computer running Chrome.
Note: when audio sharing is enabled on mobile, noise cancellation might not be available for the call.
Quick answer: for the most reliable way to share screen on Google Meet with audio, use a desktop, pick A tab, and test for a few seconds before the real share.
How to present Google Slides, Docs, and Sheets in Google Meet
If you're already in the Google ecosystem, presenting documents in Meet is simple. The trick: open the right file before clicking Share to avoid mix-ups.
Present Google Slides in Google Meet
Open the Google Slides file before the call or before clicking Share.
If slides are in a browser tab, pick A tab.
If you're already in a separate presentation window, pick A window.
Enter presentation mode beforehand so viewers see the slides full-size.
Co-presenting Slides: with a work or school Google account, you can hand off slide control to another presenter mid-call.
Share Google Docs or Google Sheets
Open the Google Docs or Google Sheets file.
Click Present now and choose A tab or A window.
Double-check the file name before sharing.
If multiple files have similar names, rename them clearly ahead of time.
Why a tab beats full screen for Google Docs
Cleaner and more focused.
Safer — no desktop or other apps leak.
Viewers see only the document you intended.
For browser-based Google docs, A tab is usually the safest choice.
Before you click Share — important pre-flight checks
A 60-second prep saves a lot of incidents during the meeting. This is the difference between a stumbling presentation and a clean, professional one.
Avoid leaking notifications and private content
Turn off notifications on your computer or phone.
Close personal email, private chat, shopping tabs, and unrelated windows.
Check your desktop before sharing the entire screen.
Move sensitive files off the main desktop if needed.
Popups from WhatsApp, Messenger, or work email are the #1 cause of accidental leaks. A single mistimed notification can derail professionalism or expose private info.
Verify the right screen or tab before clicking Share
Read the tab name or window title carefully.
On dual monitors, verify the display number.
After sharing, glance at the preview or ask a participant to confirm.
Small step, big payoff. Plenty of meetings burn their first few minutes because the presenter shared the wrong tab.
Pre-presentation checklist
Open files in the order you'll present them.
Test mic, speaker, and network connection.
Name files clearly.
Close background apps if your computer is slow.
If you'll play video, pre-load the exact tab you'll share.
In practice, weak networks and underpowered laptops are the most common reason videos stutter during sharing. Fix: close background apps and keep only the tab or window you're actually using.
Five things to verify before clicking Share
The right document.
The right tab or window.
Notifications turned off.
Network is stable.
Viewers can see and hear you clearly.
Common Google Meet screen-sharing errors and how to fix them
Most screen-share issues in Google Meet aren't complicated. They usually come down to permissions, source-picking mistakes, or temporary browser glitches.
Can't see Present now or Share screen
Common causes:
You haven't actually joined the meeting.
The Meet UI loaded incompletely.
Your app or browser is too old.
The host is restricting presenting permissions.
Quick fixes:
Confirm you've joined the meeting room.
Refresh the tab or rejoin the meeting.
Update your Google Meet app or browser.
Ask the host whether presenting is restricted.
Can't start screen sharing on desktop
Common causes:
Browser doesn't have screen-share permission.
Browser is glitching temporarily.
OS is blocking screen capture.
Quick fixes:
Approve any permission prompts the system shows.
Try again in Google Chrome.
Quit and reopen your browser.
Restart your computer if needed.
On Windows and macOS, if a permission dialog appears, grant screen recording access, then reopen Meet. On macOS Sequoia or later, you also need to grant the system audio permission separately if you want to share audio with a window or full screen.
Sharing works but there's no audio
Very common. Usually caused by picking the wrong mode or forgetting the audio toggle.
Quick fixes:
Stop sharing the current source.
Click Present now again.
Pick A tab instead of entire screen (most reliable).
For window or full screen, enable Also share system audio (Dec 2025+).
Make sure your microphone isn't muted — muting the mic stops audio sharing.
Pick the tab that's actually playing audio.
Play a test clip and ask viewers to confirm.
If it still fails, switch to Google Chrome on a desktop.
Black screen or viewers can't see content
Common causes:
Wrong source picked.
Empty tab or hidden window selected.
Weak network.
Temporary browser glitch.
Fixes:
Stop sharing and re-pick the right source.
Switch modes — e.g., from Your entire screen to A window or A tab.
Reload Google Meet.
Check your network if the image freezes or doesn't update.
In most cases this isn't a serious bug — it's a wrong-source pick.
If sharing still fails, try in this order:
Switch to Google Chrome.
Reload Meet.
Re-grant sharing permission.
Leave and rejoin the meeting.
Restart your computer.
Can the host block or stop screen sharing?
Yes. Hosts can manage participant permissions, including restricting or stopping screen sharing. This is common in online classrooms, large meetings, or any call that needs tight control.
It's also the reason many people think their device is broken when actually the meeting permissions are restricting them.
When participants can't share screen
The host may have restricted presenting permissions.
Ask the host to check meeting settings.
Very common in online classes or large meetings.
If screen sharing fails in Meet, ask the host before assuming your device is broken.
When to use host-managed presenting
Teaching online and preventing students from accidentally sharing.
Training events with large audiences.
Internal meetings that need order.
Improving security and preventing disruption during the presentation.
The biggest benefit: fewer mis-shared screens, more focused meetings.
Multiple presenters at once
Google Meet allows up to 10 simultaneous presentations in a single meeting. That means up to 10 participants can share their screen at the same time — useful for breakout-style demos or comparison reviews, though the meeting UI gets crowded fast at that count. In practice, 2–3 concurrent shares is the sweet spot for clarity.
Pair screen sharing with recording and transcripts
Screen sharing is most useful when paired with a permanent record of the meeting:
To save the demo for absentees, use the Google Meet recording feature alongside screen share.
To capture spoken content as text, use the Google Meet transcript feature.
For accessibility, turn on Google Meet captions so viewers can read along while you present.
For full meeting summaries, action items, and speaker-labeled notes, pair your share with an AI meeting note taker.
A clean demo without a record is half the value — combine sharing with the right capture tool.
Frequently Asked Questions
What's the fastest way to share screen on Google Meet desktop?
Join the call, click Present now, pick Your entire screen, A window, or A tab, then click Share. For most document or web content, pick A window or A tab — they're cleaner and safer than full screen.
Can I share screen on Google Meet from a phone?
Yes. Google Meet supports screen sharing on both Android and iPhone. Join the meeting, tap the three-dot menu, choose Share screen, then start broadcasting.
Can Google Meet share screen with audio?
Yes. On desktop, the most reliable way is Google Chrome → A tab — tab audio is shared by default. As of December 2025, you can also share system audio when presenting A window or Your entire screen, as long as you're on macOS 14.2+ or Windows 11+ and Chrome 142+. Enable the Also share system audio toggle in the source picker.
Should I pick entire screen or a tab?
It depends on the goal. Your entire screen is best when demoing multiple apps. A tab is best for sharing web content, videos, or anything with audio. If you want safer defaults, pick A tab or A window.
Why can't I share screen on Google Meet?
Common causes: screen-share permission not granted, browser or app glitching, version too old, or the host is restricting presenting. Quick fixes: reload Meet, recheck permissions, try Google Chrome, and ask the host whether sharing is restricted.
Does muting my microphone stop audio sharing?
Yes. With the December 2025 system-audio feature, muting your microphone automatically stops the device-audio share. If you need audio to keep playing for the audience, keep your mic unmuted while presenting.
How many people can share screen at the same time in Google Meet?
Up to 10 simultaneous presentations are allowed in a single Google Meet call. In practice, 2–3 concurrent shares is the sweet spot — beyond that, the meeting view gets cramped.
Once you know where the Present now button is, which mode to pick, and how to fix the common errors, screen sharing on Google Meet feels effortless on both computer and mobile. Try it in your next call — and if you present often, pair it with recording, captions, or a transcript so the demo doesn't disappear when the meeting ends.